The anchor point is the point around which transformations, such as scaling or rotation, are performed. By default, a layer’s anchor point is at the center of the layer.
You’ll change the anchor points for the character’s arm and head so that you can better control the character’s movements as he tugs on the cord to ignite the fire and as he looks up and down.
- Double-click the Balloon composition in the Project panel to open it in the Composition panel and the Timeline panel.
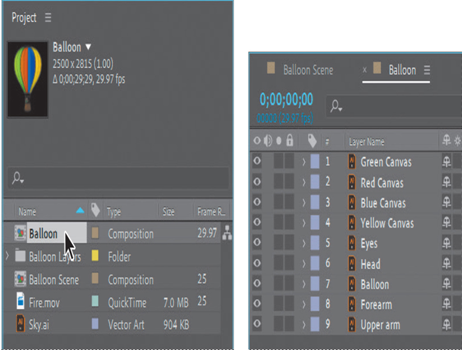
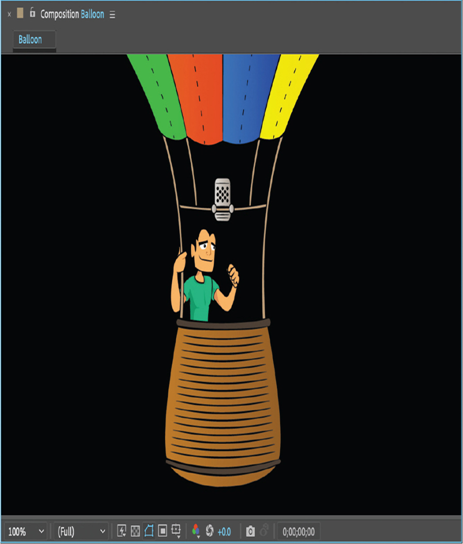
The Balloon composition includes layers for the canvas colors, the balloon itself, and the character’s eyes, head, forearm, and upper arm.
2.Zoom in using the Magnification Ratio pop-up menu at the bottom of the Composition panel so you can see the balloon’s detail more clearly.
3.Select the Hand tool () in the Tools panel, and then pan so that the character is centered in the Composition panel.
4.Select the Selection tool () in the Tools panel.
5.Select the Upper arm layer in the Timeline panel.
6.Select the Pan Behind tool () in the Tools panel (or press Y to activate it).
With the Pan Behind tool, you can move the anchor point without moving the entire layer in the Composition window.

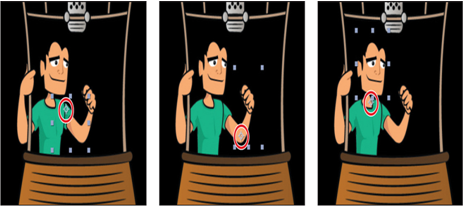
7.Move the anchor point to the character’s shoulder.
8.Select the Forearm layer in the Timeline panel, and then move its anchor point to the elbow.
9.Select the Head layer in the Timeline panel, and move its anchor point to the character’s neck.
10.Select the Selection tool in the Tools panel.
11.Choose File > Save to save your work so far.
Parenting layers
This composition includes several layers that need to move together. For example, as the balloon floats, the character’s arm and head should move along with it. As you’ve seen in previous lessons, a parenting relationship synchronizes changes in the parent layer with corresponding changes in the child layer. You’ll establish parenting relationships among the layers in this composition, and you’ll add the fire video as well.
- Deselect all layers in the Timeline panel, and then press Ctrl (Windows) or Command (macOS) as you select the Head and Upper arm layers.
- In the Parent column for either of the selected layers, choose 7. Balloon from the pop-up menu.
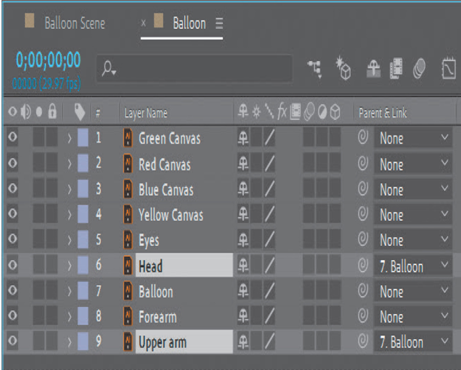
This establishes both the Head and Upper arm layers as child layers of the Balloon layer. When the Balloon layer moves, the other two layers will move with it.
The eyes not only need to move with the balloon, they need to move with the head, so you’ll create that parenting relationship next.
3.In the Parent column for the Eyes layer, choose 6. Head from the pop-up menu.
The forearm should move with the upper arm as well.
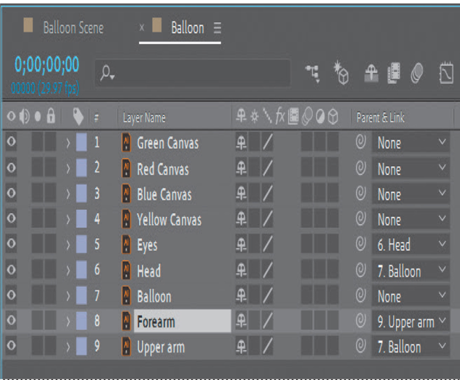
4.In the Parent column for the Forearm layer, choose 9. Upper arm from the pop-up menu.
Now you need to ensure that the fire video travels with the balloon.
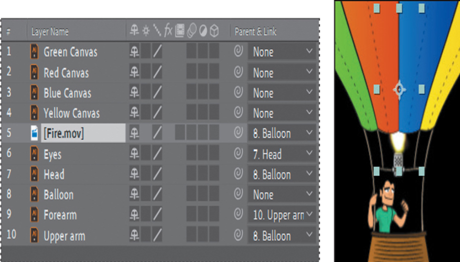
5.Drag the Fire.mov file from the Project panel to the Timeline panel, positioning it directly below the canvas layers so that the fire will appear to go inside the balloon, rather than outside it. (The Fire layer should be between the Yellow Canvas layer and the Eyes layer.)
The fire video is positioned in the center of the composition, so you’ll need to zoom out a bit to see it.
- Choose 25% from the Magnification Ratio pop-up menu so that you can see the outline of the selected video.
- In the Composition window, drag the fire video over the burner. To see the flame in action so you can position it correctly, drag the current-time marker across the first second of the time ruler.
- When you’re satisfied with the Fire layer’s position, choose 8. Balloon from the pop-up menu in the Fire layer’s Parent column.
9.Choose File > Save to save your work so far.
