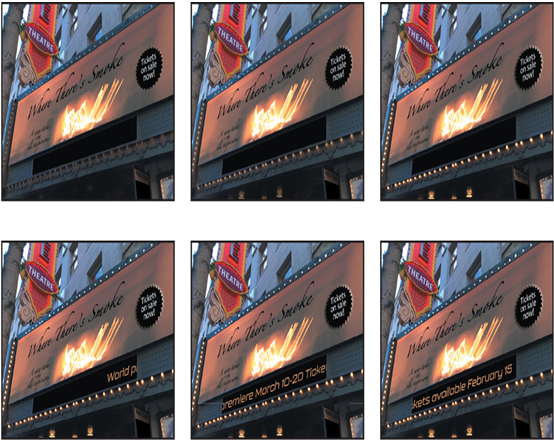
The text scrolls well, but it overlaps the rest of the marquee, and even the lights on the left side. You’ll use a track matte to confine the text to the black ticker field. You’ll use the alpha channel of the Scroll area layer for the track matte.
- Click Toggle Switches/Modes at the bottom of the Timeline panel to display the Track Matte column, so you can apply the track matte.
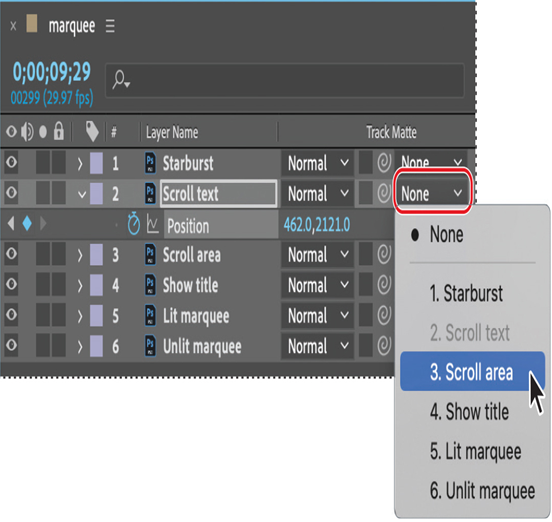
- Select the Scroll text layer, and choose “3. Scroll area” from the Track Matte pop-up menu.

The alpha channel of the layer you selected (Scroll area) is used to set transparency for the Scroll text layer, so the contents of that layer appear only within the matte defined by the Scroll area layer. The video switch is automatically deselected for the Scroll area layer when you apply the track matte.
With the Scroll area layer deselected there are light artifacts at the top of the text area. You’ll make the layer visible to hide those lights without compromising the track matte.
- Click the eye icon ( ) for the Scroll area layer in the Timeline panel.
- Deselect all layers, and hide all layer properties.
- Press the Home key or move the current-time indicator to the beginning of the time ruler, and then press the spacebar to preview the animation. Press the spacebar again when you’re done.

- Choose File > Save to save your project.
About track mattes and traveling mattes
When you want one layer to show through a hole in another layer, set up a track matte. You’ll need two layers—one to act as a matte, the other to fill the hole in the matte. You can animate either the track matte layer or the fill layer. When you animate the track matte layer, you create a traveling matte. If you want to animate the track matte and fill layers using identical settings, you can precompose them.
You define transparency in a track matte using values from either its alpha channel or the luminance of its pixels. Using luminance is handy when you want to create a track matte from a layer without an alpha channel, or a layer imported from a program that can’t create an alpha channel. In both alpha-channel mattes and luminance mattes, pixels with higher values are more transparent. In most cases, you use a high-contrast matte so that areas are either completely transparent or completely opaque. Intermediate shades should appear only where you want partial or gradual transparency, such as along a soft edge.
By default, After Effects uses alpha channel values to create a track matte. To use the luminance values instead, click the circle icon ( ) next to the Track Matte column to change it to the sun icon ( ). To invert the matte, click the empty square so that it displays the inverted icon ( ).

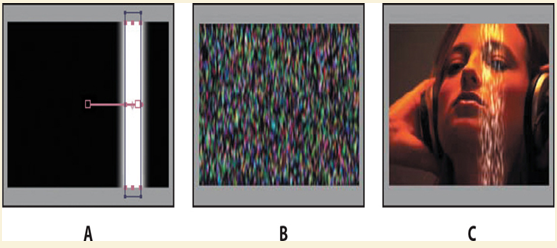
Anatomy of a traveling matte
A. Track matte layer: A solid with a rectangular mask, set to Luma Matte. The mask is animated to travel across the screen.
B. Fill layer: A solid with a pattern effect.
C. Result: The pattern is seen in the track matte’s shape and added to the image layer, which is below the track matte layer.
