The sea turtle clip is a little too big for the tablet screen and it’s not quite the right angle. You’ll convert it to a 3D layer, which will give you more control over its shape and size.
- Still at 2:07, select the SeaTurtle.mov layer.
- With the SeaTurtle.mov layer selected in the Timeline panel, click the 3D switch (
) for the layer.
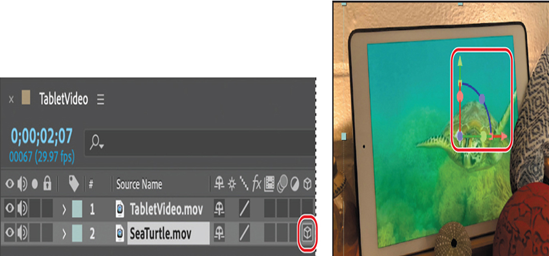
The 3D Transformation Gizmo appears in the Composition panel, and the Properties panel includes the Orientation property and multiple Rotation properties. Most properties in the Properties panel now have three values: From left to right, they represent the x, y, and z axes of the image. The z axis controls the depth of the layer. These axes are represented in the 3D Transformation Gizmo.
Note
You’ll learn more about 3D layers in Lessons 12, “Using 3D Features,” and 13, “Working with the 3D Camera Tracker.”
- In the Properties panel, change the Scale to 90%.
- Make sure the Selection tool is selected, and then use the 3D Transformation Gizmo in the Composition panel to adjust the position of the video in the screen.
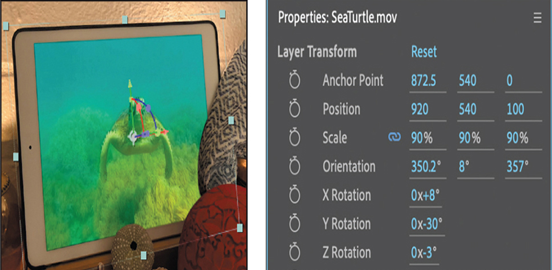
Drag the red arrow to move the layer horizontally, the green arrow to move it vertically, and the blue arrow to change the depth. Drag the ball along the curved red line to rotate the layer around the x axis; drag the green ball along the curved green line to rotate it around the y axis; and drag the blue ball along the curved blue line to rotate it around the z axis. - Make any additional adjustments, including changes to the Rotation values, so that your composition resembles the following image. Your values may not match ours, depending on how you shifted the SeaTurtle layer earlier.
Tip
To specify whether the 3D Transformation Gizmo affects Rotation or Orientation values, select the Rotation tool in the Tools panel and choose an option from the Set menu. You can also type values directly in the Properties panel instead of dragging in the Composition panel.
- Choose File > Save to save your work.
Adjusting the opacity
The video appears abruptly. You’ll smooth its appearance by adjusting the opacity at the beginning.
- Make sure you are still at 2:07 in the time ruler and the SeaTurtle.mov layer is selected.
- In the Properties panel, change the Opacity to 0%, and then click the stopwatch icon ( ) to create an initial keyframe.
- Go to 3:15, and change the Opacity to 100%.
- Hide properties for all layers in the Timeline panel, and deselect all layers.
- Press the Home key or move the current-time indicator to the beginning of the time ruler, and then press the spacebar to preview your work. Press the spacebar again when you’re done.

Adding a shadow
The masked image looks convincing, but you can make it look even more realistic by adding a shadow to the screen.
- Click an empty area in the Timeline panel to deselect all layers, and then choose Layer > New > Solid.
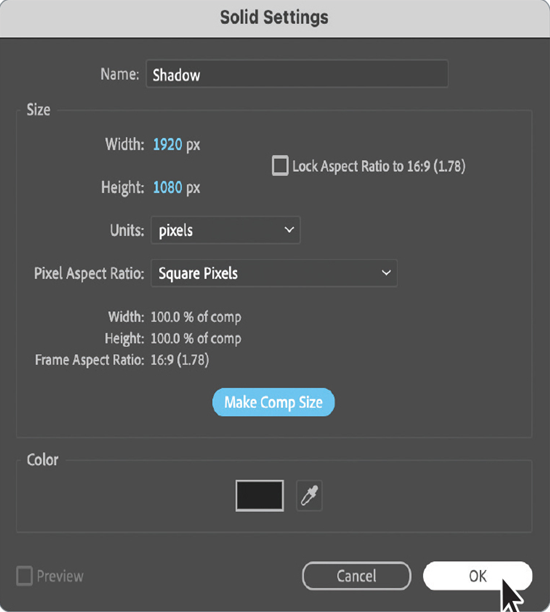
- In the Solid Settings dialog box, name the layer Shadow, click the Make Comp Size button, choose a dark gray color (we used R=34, G=34, B=34,), and then click OK.
Instead of trying to exactly re-create the shape of the TabletVideo.mov layer’s mask, it’s easier to copy it to the Shadow layer and adjust it. - Press the Home key or move the current-time indicator to the beginning of the time ruler.
- Select the TabletVideo.mov layer in the Timeline panel, and press the M key to display the Mask Path property for the mask.
- Select Mask 1, and then choose Edit > Copy or press Ctrl+C (Windows) or Command+C (macOS).
- Select the Shadow layer in the Timeline panel, and then choose Edit > Paste or press Ctrl+V (Windows) or Command+V (macOS).
- Hide the properties for the TabletVideo.mov layer.
This time, you want to keep the area inside the mask opaque and make the area outside the mask transparent. - Select the Shadow layer, and press the F key to reveal the Mask Feather property for the mask.
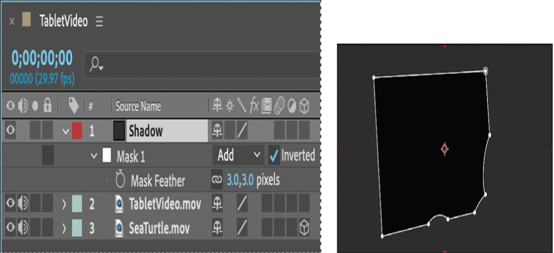
- Change the Mask Feather value to 0 (zero).
- Deselect the Inverted option.
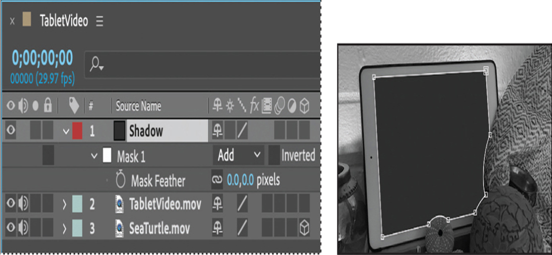
The Shadow layer now obscures the SeaTurtle.mov layer.
