The text’s movement will look more authentic if it includes motion blur. You’ll add the motion blur and then set the shutter angle and phase, which control the intensity of the blur.
- Go to 8:00, so you can see the scrolling text well.
- Click Toggle Switches/Modes at the bottom of the Timeline panel.
- Click the Motion Blur ( ) switch for the Scroll text layer.
After Effects enables Motion Blur for the entire composition, and the text layer appears less sharp in the Composition panel. - Choose Composition > Composition Settings.
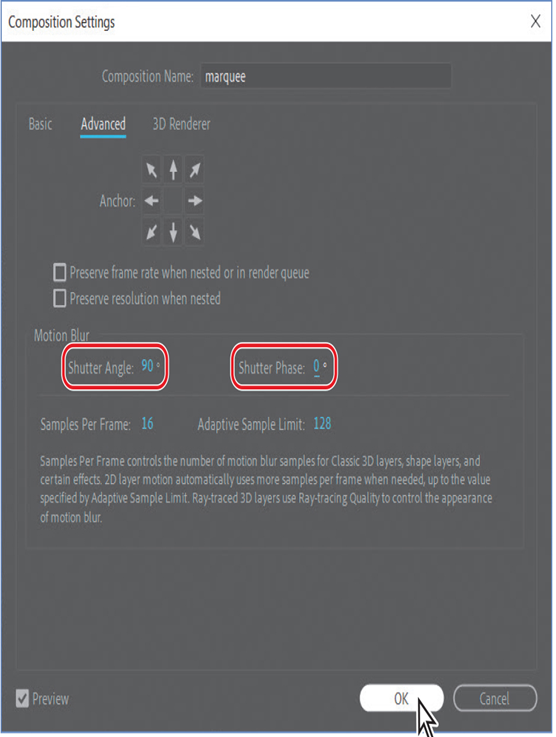
- In the Composition Settings dialog box, click the Advanced tab, and reduce the Shutter Angle to 90 degrees.
The Shutter Angle setting imitates the effect of adjusting a shutter angle on a real camera, which controls how long the camera aperture is open, gathering light. Larger values create more motion blur. - Change the Shutter Phase to 0 degrees, and then click OK.
Animating using the Corner Pin effect
The marquee is looking pretty good, but the starburst isn’t terribly noticeable. You’ll use the Corner Pin effect to distort it over time and draw attention to it.
Using the Corner Pin effect is similar to animating with the Free Transform tool in Photoshop—the effect distorts an image by repositioning each of its four corners. You can use it to stretch, shrink, skew, or twist an image, or to simulate perspective or movement that pivots from the edge of a layer, such as a door opening.
- Go to 4:00.
- In the Timeline panel, click the Solo switch (
) for both the Show title and Starburst layers.
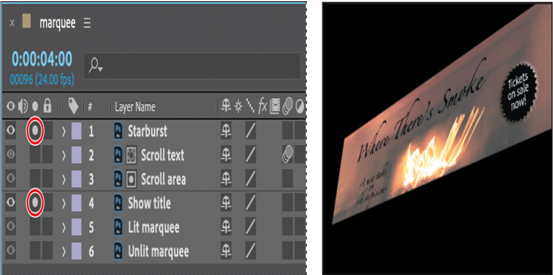
Soloing the layers isolates them to speed animating, previewing, and rendering.
- Select the Starburst layer in the Timeline panel, and then choose Effect > Distort > Corner Pin. Small circles appear around the corner points of the Starburst layer in the Composition panel.
Note
If you don’t see the controls, choose View Options from the Composition panel menu. In the View Options dialog box, select the Handles and Effect Controls options, and then click OK.
You’ll start by creating initial keyframes at their current locations. - If the Effect Controls panel isn’t already open, choose Window > Effect Controls.
- In the Effect Controls panel, click the stopwatch icon ( ) next to each of the pins—Upper Left, Upper Right, Lower Left, and Lower Right—to set initial keyframes.
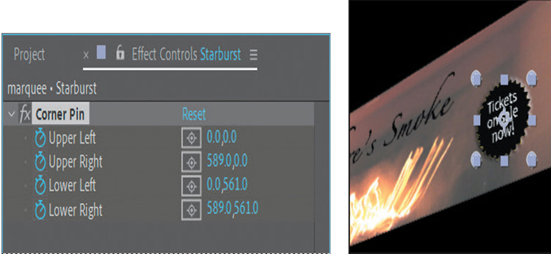
- Go to 6:00, and then drag each of the four corner-pin handles outward. With the Corner Pin tool, you can move each handle a different amount. Notice that the x and y coordinates update in the Effect Controls panel. After Effects adds keyframes.
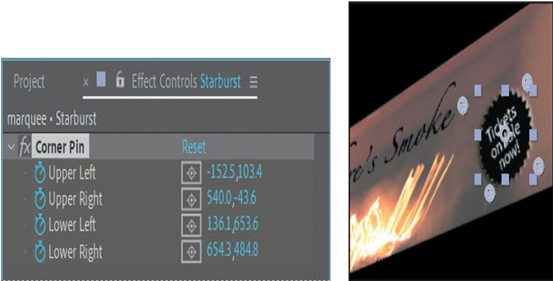
Instead of dragging the handles, you can manually enter the values shown in the following figure.
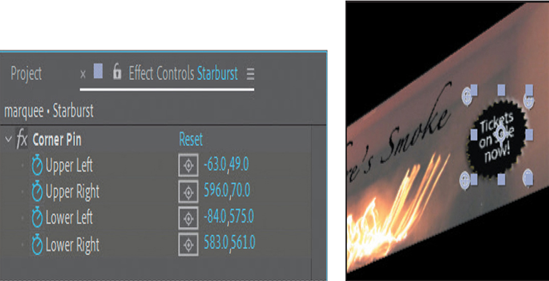
- Go to 8:00, and then drag the corner-pin handles so that the text is tilted at an angle. Your corner-pin locations should be similar to those in the figure below. After Effects adds keyframes.
- Click the Solo switches ( ) for the Show title and Starburst layers to restore the view of the other layers.
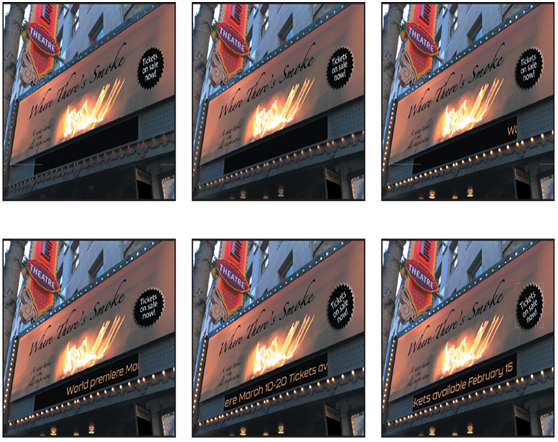
- Press the Home key or move the current-time indicator to the beginning of the time ruler. Press the spacebar to preview the entire animation, including the corner-pin effect. When you’re done, press the spacebar again.
10. Choose File > Save to save your project.
