The neighboring objects should cast a shadow, but it shouldn’t affect the entire screen. You’ll use the Pen tools to reduce the mask to cover only the lower right section of the screen.
- Select the Delete Vertex tool (
), hidden beneath the Convert Vertex tool in the Tools panel.
- Click the upper left vertex to delete it.
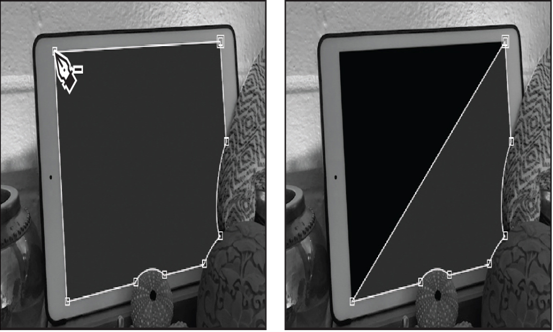
- Select the Selection tool ( ) in the Tools panel, and then drag the lower left and upper right vertices closer to the lower right corner of the screen, as in the following image.
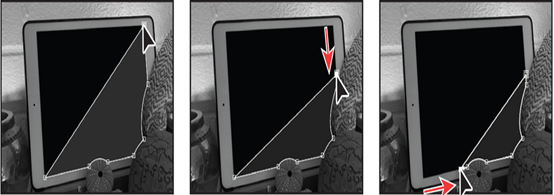
- Select the Add Vertex tool ( ), hidden beneath the Delete Vertex tool in the Tools panel.
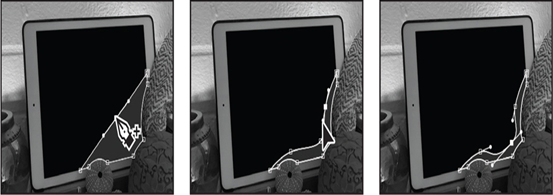
- Add vertices to the upper path (currently a diagonal line), and then use the Convert Vertex ( ) and Selection tools to position and shape the path into a curve similar to the following images.
Feathering the edges of the shadow
Shadows rarely have sharp edges. You’ll adjust the feather for the mask so that the shadow fades into the rest of the screen.
- Go to 3:15.
- Select the Mask Feather tool ( ), hidden beneath the Convert Vertex tool ( ) in the Tools panel.
You used the Mask Feather property to adjust the width of the feather the same amount all the way around the original mask. However, the Mask Feather tool gives you more flexibility, letting you vary the feathering width at points you define on the closed mask. - In the Timeline panel, select the Shadow layer. Then, in the Composition panel, click the lower left vertex to create a feather point.
- Click the feather point again, and without releasing the mouse button, drag that feather point outward to increase the feathering margin for the entire mask.
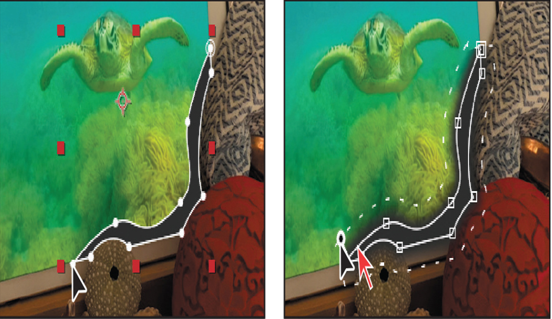
Currently the feather, represented by dashed lines, extends evenly across the mask. You’ll add more feather points for greater flexibility.
- Click the vertex on the right side of the sea urchin.
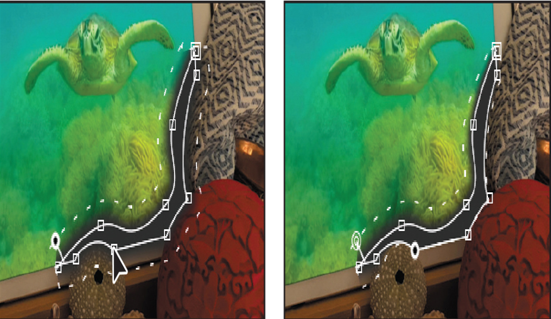
A feathering point is created, and the feather shrinks back to the mask edge on the lower and right sides of the screen, but the feathering remains on the upper side of the mask. The objects that are casting the shadow shouldn’t be shadowed.
- Click the dashed line just under the vertex on the left side of the sea urchin, and drag the feathering boundary up to the screen.
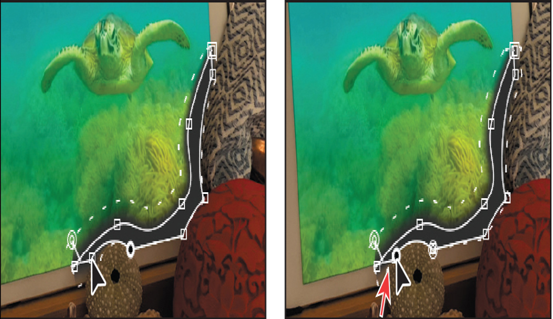
- (Optional) Adjust the feathering elsewhere by creating a feather point on the boundary and dragging it.
Now the shadow doesn’t appear on any of the objects.
The shape of the shadow is good, but it’s obscuring the image. You’ll change the opacity to reduce its effect. - Select the Shadow layer in the Timeline panel, and then change its Opacity value to 20% in the Properties panel.
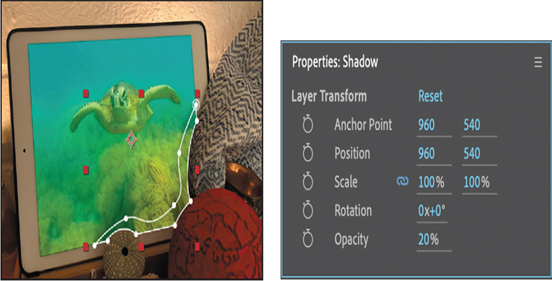
9. Hide all properties in the Timeline panel, and then press F2 or click an empty area in the Timeline panel to deselect all layers.
