Duplicating keyframes to repeat an animation – Animating a Multimedia Presentation

Now that you’ve labeled the initial keyframes, you can easily repeat them at different times in the timeline. You’ll duplicate the tugging arm, and then create corresponding head and eye movements.

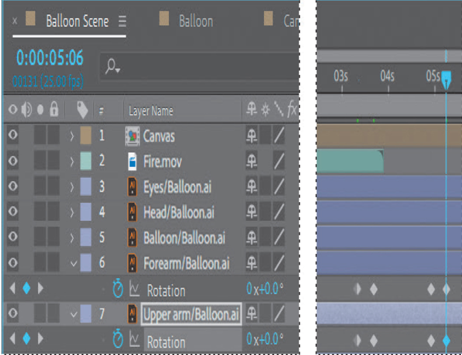
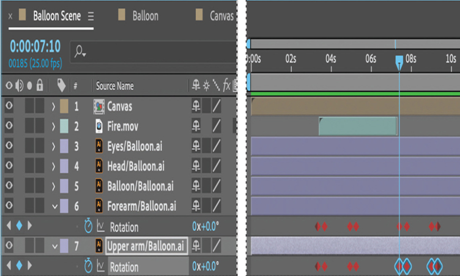
  1. Right-click (Windows) or Control-click (macOS) one of the keyframes in the Forearm layer, and choose Select Keyframe Label Group > On Selected Layers to select all its keyframes.
  2. Press Ctrl+C (Windows) or Command+C (macOS) to copy the keyframes.
  3. Go to 7:10, the point at which the character tugs the cord again.
  4. Press Ctrl+V (Windows) or Command+V (macOS) to paste the keyframes.
  5. Repeat steps 1–4 to copy the Upper arm Rotation property keyframes.
  1. Hide the properties for all layers.
  2. Go to 3:08. Select the Head layer, and click the stopwatch icon for the Rotation property in the Properties panel to create an initial keyframe.
  3. Go to 3:17, and change the Rotation property to –10.3.
  4. Go to 4:23, and click the Add Or Remove Keyframe At Current Time icon to add a keyframe at the current value.
  5. Go to 5:06, and change the Rotation property to 0.
  6. In the Timeline panel, select the Rotation property to select all of its keyframes. Right-click or Control-click a selected keyframe, and choose Label > Blue.
    Now the character tilts his head up when he tugs the cord. You’ll also animate the position of his eyes to create a subtle change when he tilts his head.
  7. Select the Eyes layer.
  8. Go to 3:08, and click the stopwatch icon for the Position property in the Properties panel to create an initial keyframe at the current value (62, 55).

14.Go to 3:17, and change the Position value to 62.4, 53.
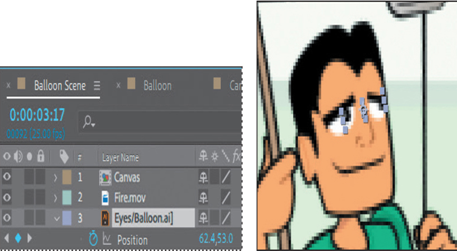
  1. Go to 4:23, and create a keyframe at the current value.
  2. Go to 5:06, and change the Position value to 62, 55.
  3. In the Timeline panel, select the Position property to select all its keyframes, and then right-click or Control-click one, and choose Label > Blue.
  4. Right-click or Control-click a Rotation keyframe in the Head layer, choose Select Keyframe Label Group > On Selected Layers, and then press Ctrl+C (Windows) or Command+C (macOS) to copy the keyframes.
  5. Go to 7:10, and paste the keyframes.
  6. Repeat steps 18-19 for the Position property in the Eyes layer.
  7. Hide all layer properties, and then deselect all layers.
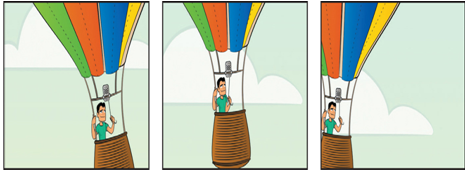
  8. Choose Fit from the Magnification Ratio pop-up menu in the Composition window so that you can see the entire scene. Then preview the animation.
23.Save your work.

Animating additional elements – Animating a Multimedia Presentation

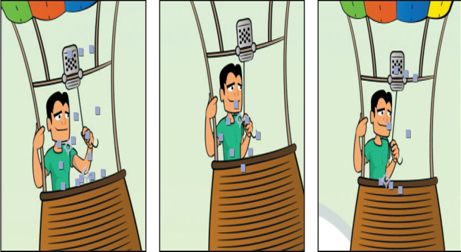
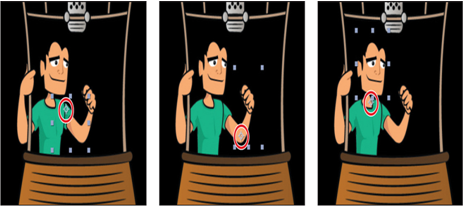
The balloon swoops and swirls through the sky, and its child layers go with it. But the character is currently static in his balloon. You’ll animate his arm tugging on the cord to ignite the burner.

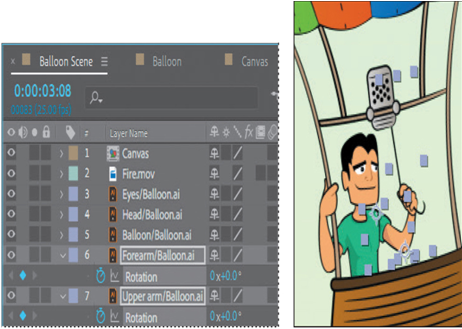
  1. Go to 3:08.
  2. Choose 100% from the Magnification Ratio pop-up menu in the Composition window so that you can see the character clearly. Use the Hand tool to adjust the image in the Composition window if you need to.
  3. Shift-select the Forearm/Balloon.ai layer and the Upper arm/Balloon.ai layer.
  4. In the Properties panel, click the stopwatch icon next to the Rotation property to create an initial keyframe for each layer.

After Effects displays the Rotation property and initial keyframe for each layer in the Timeline panel.

  1. Go to 3:17, the point at which the character will tug the cord to ignite the burner.
  2. Deselect the layers.
  3. In the Timeline panel, change the Rotation property for the Forearm layer to –35 and the Rotation property for the Upper arm layer to 46.
    The character tugs the cord down. You may need to deselect the layers so you can see the action clearly in the Composition window.
  4. Go to 4:23, and change the Rotation property for the Forearm layer to –32.8.

9.Click the Add Or Remove Keyframe At Current Time button (Add or remove Keyframe at current time button icon) to the left of the Rotation property for the Upper arm layer.

10.Go to 5:06, and change the Rotation value for both layers to 0.

  1. Deselect both layers, and then manually preview from 3:00 to 5:07 to see the character tug the cord. You may need to zoom out to see the animation.

Adding color labels to keyframes
In a complex composition, you may have to create hundreds of keyframes. Assigning color labels to keyframes lets you organize, identify, and quickly select components of your work. You’ll assign colors to the keyframes you just created to make it easier to identify and duplicate them.

  1. Right-click (Windows) or Control-click (macOS) one of the keyframes you just created.
  2. Choose Label > Red.
    The keyframe is now red. You can add labels individually, but since you want to label all the keyframes currently in the layer, it will be faster to assign the label to them all at once.
  3. Select the Rotation property for the Forearm/Balloon layer to select all four of its keyframes.
  4. Shift-select the Rotation property for the Upper arm/Balloon layer to also select its keyframes.
  5. Right-click or Control-click a selected keyframe, and choose Label > Red.
  6. Press F2 or click an empty area in the Timeline panel to deselect all layers.

Customizing a motion path – Animating a Multimedia Presentation

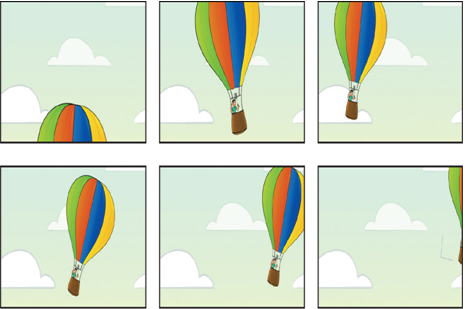
The balloon moves through the scene, but its path isn’t very interesting, and it isn’t onscreen long. You’ll customize the path between its start point and end point. You can use the values we used or create your own path, as long as the balloon stays fully visible on the screen until a little after 11 seconds, and then slowly makes its way offscreen.

  1. Go to 3:00.
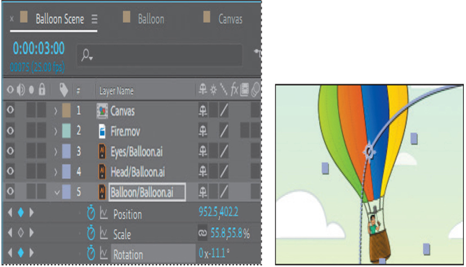
  2. Drag the balloon straight up so that the character and the basket are fully visible, and then rotate it slightly to the left. (We used Position 952.5, 402.2; Rotation –11.1 degrees.)
  1. Go to 6:16.
  2. Shift the balloon’s rotation the other direction. (We used 9.9 degrees.)
  3. Move the balloon to the left side of the scene. (We used Position 531.7, 404.)
  4. Go to 7:20.
  5. Change the scale to 39.4%.
  6. Set additional Rotation keyframes to create swirling motions. If you’re using our values, do the following:

Tip

You can change settings in the Properties panel or the Timeline panel; in this exercise, it’s more efficient to set Rotation keyframes in the Timeline panel.
• At 8:23, change the Rotation value to –6.1.
• At 9:16, change the Rotation value to 22.1.
• At 10:16, change the Rotation value to –18.3.
• At 11:24, change the Rotation value to 11.9.
• At 14:19, change the Rotation value to –8.1.

  1. Set additional Position keyframes to move the balloon. If you’re using our values, do the following:
    • At 9:04, change the Position to 726.5, 356.2.
    • At 10:12, change the Position to 1396.7, 537.1.
  2. Press the spacebar to preview the balloon’s current path, and then press the spacebar again to stop the preview. Save your work so far.

Using Bezier handles to smooth a motion path

The basic path is in place, but you can smooth it out a bit. Each keyframe includes Bezier handles that you can adjust to change the angle of the curve. You’ll learn more about Bezier curves in Lesson 7.

  1. Choose 50% from the Magnification Ratio pop-up menu in the Composition panel.
  2. Make sure the Balloon/Balloon.ai layer is selected in the Timeline panel. Then move the current-time indicator to a position where you can clearly see the motion path in the Composition panel. (Between 4 and 6 seconds is probably good.)
  3. Click a keyframe point in the Composition panel to reveal its Bezier handles, if they aren’t already shown.

Note

If Bezier handles don’t appear when you click with the Selection tool, use the Convert Vertex tool (hidden behind the Pen tool) to display them.

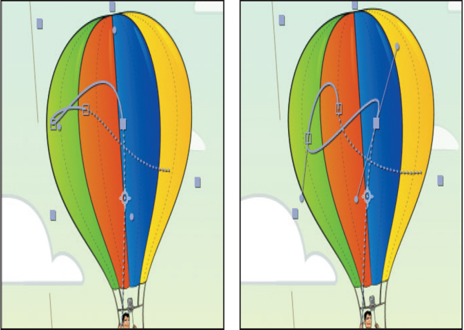
4.Drag a Bezier handle to change the curve for that keyframe.

5.Continue to drag Bezier handles for the keyframe points until you achieve the path you want. Our final path is shown below in the image on the right.

6.Preview the balloon on the path by moving the current-time indicator across the time ruler. Make any adjustments you want. You can also make adjustments later, after you’ve animated the canvas and sky.

7.Hide the properties for the Balloon layer in the Timeline panel, and save your work so far.

Precomposing layers – Animating a Multimedia Presentation

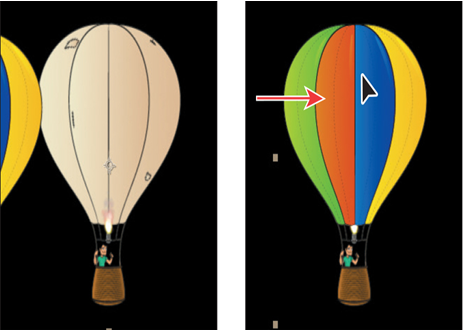
As you’ve seen in previous lessons, sometimes it’s easier to work with a set of layers. Precomposing layers moves them to a new composition, nested inside the original composition. You’ll precompose the canvas layers so that you can work with them separately when you animate them sailing off the balloon.

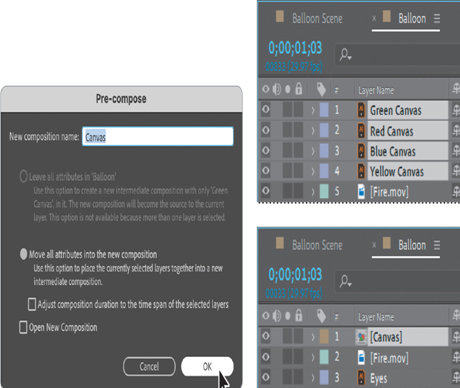
  1. In the Balloon Timeline panel, Shift-click the Green Canvas and Yellow Canvas layers to select all four canvas layers.
  2. Choose Layer > Pre-compose.
  3. In the Pre-compose dialog box, name the composition Canvas, select Move All Attributes Into The New Composition, and click OK.

The four layers you selected in the Timeline panel are replaced by a single Canvas composition layer.

4.Double-click the Canvas layer in the Timeline panel to edit the composition.

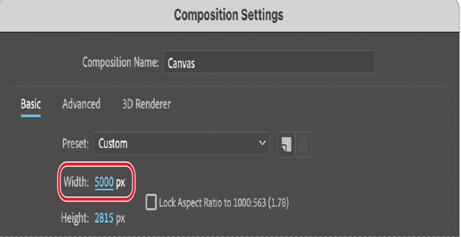
5.Choose Composition > Composition Settings.

6.In the Composition Settings dialog box, deselect Lock Aspect Ratio, change the Width value to 5000 px, and click OK.

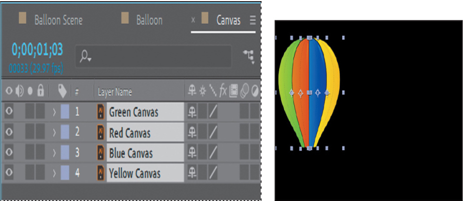
7.Shift-select all four layers in the Timeline panel, and then drag them to the far left side of the Composition panel. You may need to change the magnification.

Increasing the width of the composition and then moving the canvas to the far left side will give you room to animate the canvas layers later.

8.Switch to the Balloon Timeline panel.

You moved the canvas to the far left side of the Canvas composition, revealing the uncovered balloon in the Balloon composition. At the beginning of the animation, though, the canvas should be on the balloon. You’ll reposition the Canvas layer.

9.Choose Fit from the Magnification Ratio pop-up menu in the Composition panel so you can see the full balloon.

10.Select the Canvas layer in the Timeline panel, and then drag the layer so that it covers the bare balloon in the Composition panel.

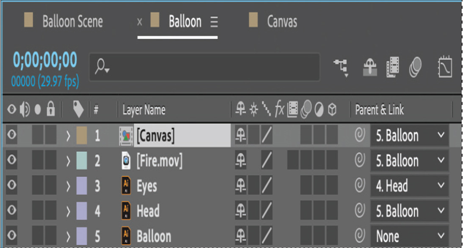
11.In the Parent column of the Canvas layer, choose 5. Balloon from the pop-up menu so that the canvas will follow the balloon.

    Keyframing a motion path

    Now that all the initial pieces are set up, you’re ready to animate the balloon and the character using position and rotation keyframes.

    Adjusting anchor points – Animating a Multimedia Presentation

    The anchor point is the point around which transformations, such as scaling or rotation, are performed. By default, a layer’s anchor point is at the center of the layer.

    You’ll change the anchor points for the character’s arm and head so that you can better control the character’s movements as he tugs on the cord to ignite the fire and as he looks up and down.

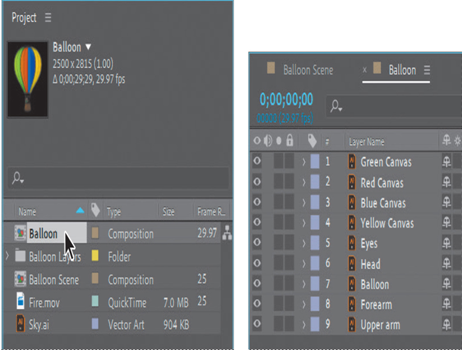
    1. Double-click the Balloon composition in the Project panel to open it in the Composition panel and the Timeline panel.

    The Balloon composition includes layers for the canvas colors, the balloon itself, and the character’s eyes, head, forearm, and upper arm.

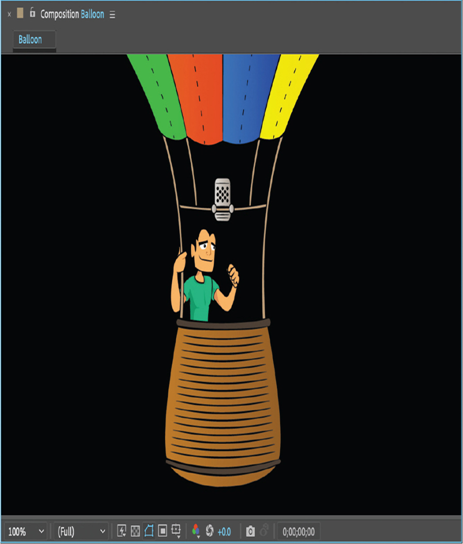
    2.Zoom in using the Magnification Ratio pop-up menu at the bottom of the Composition panel so you can see the balloon’s detail more clearly.

    3.Select the Hand tool (Hand tool icon) in the Tools panel, and then pan so that the character is centered in the Composition panel.

    4.Select the Selection tool (Selection tool icon) in the Tools panel.

    5.Select the Upper arm layer in the Timeline panel.

    6.Select the Pan Behind tool (Pan Behind tool icon) in the Tools panel (or press Y to activate it).

    With the Pan Behind tool, you can move the anchor point without moving the entire layer in the Composition window.

    7.Move the anchor point to the character’s shoulder.

    8.Select the Forearm layer in the Timeline panel, and then move its anchor point to the elbow.

    9.Select the Head layer in the Timeline panel, and move its anchor point to the character’s neck.

    10.Select the Selection tool in the Tools panel.

    11.Choose File > Save to save your work so far.

      Parenting layers

      This composition includes several layers that need to move together. For example, as the balloon floats, the character’s arm and head should move along with it. As you’ve seen in previous lessons, a parenting relationship synchronizes changes in the parent layer with corresponding changes in the child layer. You’ll establish parenting relationships among the layers in this composition, and you’ll add the fire video as well.

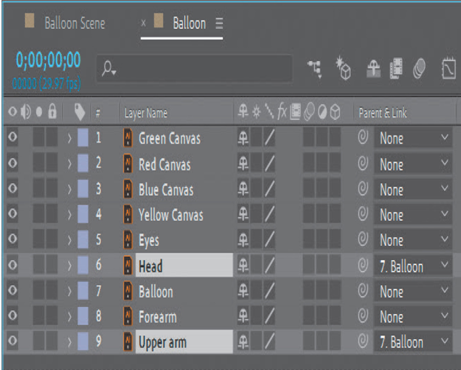
      1. Deselect all layers in the Timeline panel, and then press Ctrl (Windows) or Command (macOS) as you select the Head and Upper arm layers.
      2. In the Parent column for either of the selected layers, choose 7. Balloon from the pop-up menu.

      This establishes both the Head and Upper arm layers as child layers of the Balloon layer. When the Balloon layer moves, the other two layers will move with it.

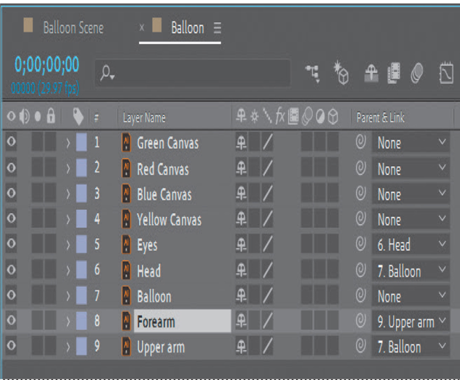
      The eyes not only need to move with the balloon, they need to move with the head, so you’ll create that parenting relationship next.

      3.In the Parent column for the Eyes layer, choose 6. Head from the pop-up menu.

      The forearm should move with the upper arm as well.

      4.In the Parent column for the Forearm layer, choose 9. Upper arm from the pop-up menu.

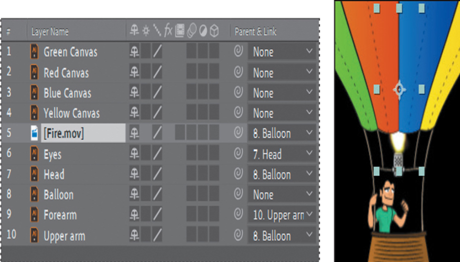
      Now you need to ensure that the fire video travels with the balloon.

      5.Drag the Fire.mov file from the Project panel to the Timeline panel, positioning it directly below the canvas layers so that the fire will appear to go inside the balloon, rather than outside it. (The Fire layer should be between the Yellow Canvas layer and the Eyes layer.)

      The fire video is positioned in the center of the composition, so you’ll need to zoom out a bit to see it.

      1. Choose 25% from the Magnification Ratio pop-up menu so that you can see the outline of the selected video.
      2. In the Composition window, drag the fire video over the burner. To see the flame in action so you can position it correctly, drag the current-time marker across the first second of the time ruler.
      3. When you’re satisfied with the Fire layer’s position, choose 8. Balloon from the pop-up menu in the Fire layer’s Parent column.

      9.Choose File > Save to save your work so far.