You’re ready to manipulate the speed and direction of time in your project.
- With the Pre-comp 1 layer selected in the Timeline panel, choose Layer > Time > Enable Time Remapping.

After Effects adds two keyframes, at the first and last frames of the layer, visible in the time ruler. A Time Remap property also appears under the layer name in the Timeline panel; this property lets you control which frame is displayed at a given point in time.
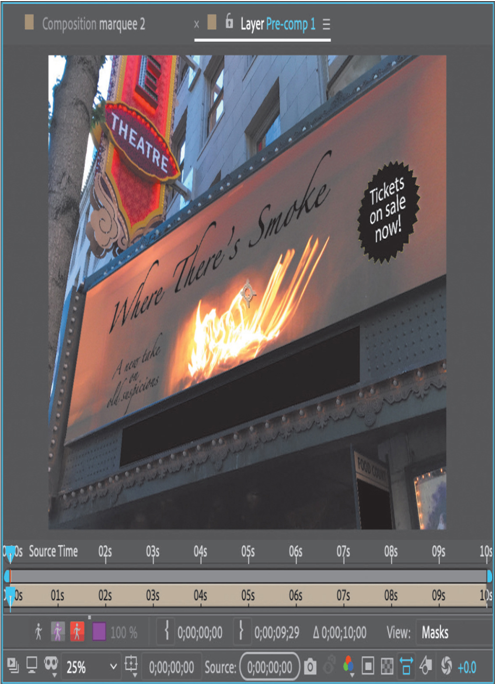
- With the Pre-comp 1 layer active, choose Layer > Open Layer to open it in the Layer panel.

The Layer panel provides a visual reference of the frames you change when you remap time. It displays two time rulers: The time ruler at the bottom of the panel displays the current time. The Source Time ruler, just above the time ruler, has a remap-time marker that indicates which frame is playing at the current time.
- Press the spacebar to preview the layer, and notice that the source-time and current-time markers in the two Layer panel rulers are synchronized. That will change as you remap time.
Over the first four seconds, the lights come on slowly. You’ll speed that section up so that the lights come on twice as fast. - Go to 2:00, and change the Time Remap value to 4:00.
This remaps time so that frame 4:00 plays at 2:00. In other words, the clip now plays back at twice the speed for the first two seconds of the composition.

- Press the spacebar to preview the animation. The composition now runs at double-speed until 2:00, and at a slower speed thereafter. Press the spacebar again when you have finished previewing the animation.
Viewing time remapping in the Graph Editor
Using the Graph Editor, you can view and manipulate all aspects of effects and animations, including effect property values, keyframes, and interpolation. The Graph Editor displays changes in effects and animations as a two-dimensional graph, with playback time represented horizontally (from left to right). In layer bar mode, in contrast, the time ruler represents only the horizontal time element, without a graphical display of changing values.
- Make sure the Time Remap property is selected for the Pre-comp 1 layer in the Timeline panel.
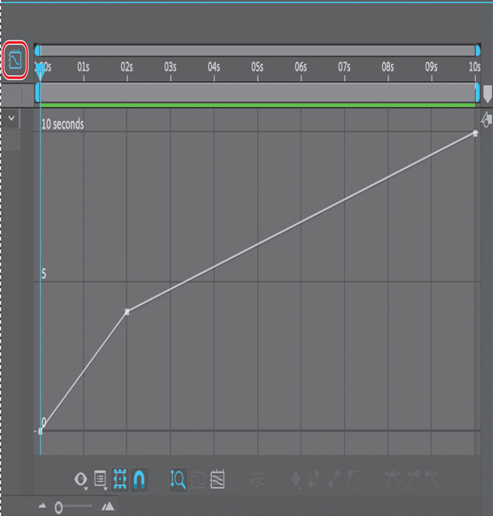
- Click the Graph Editor button ( ) to display the Graph Editor.

The Graph Editor displays a time-remap graph that shows a white line connecting the keyframes at 0:00, 2:00, and 10:00. The angle of the line is steep up to 2:00, and then becomes shallower. The steeper the line, the faster the playback time.
